Having always lived in cities, I never really appreciated stargazing photos until I started traveling. I remember being in the back of a truck on a volunteer trip in Honduras, looking up and letting out a shocked cry. They were BEAUTIFUL. While memories are great, I prefer photos. But no matter how hard I tried photographing stars in all of the places I traveled, I could never capture what I wished to keep. So I just gave up, and appreciated that I was seeing them at all.
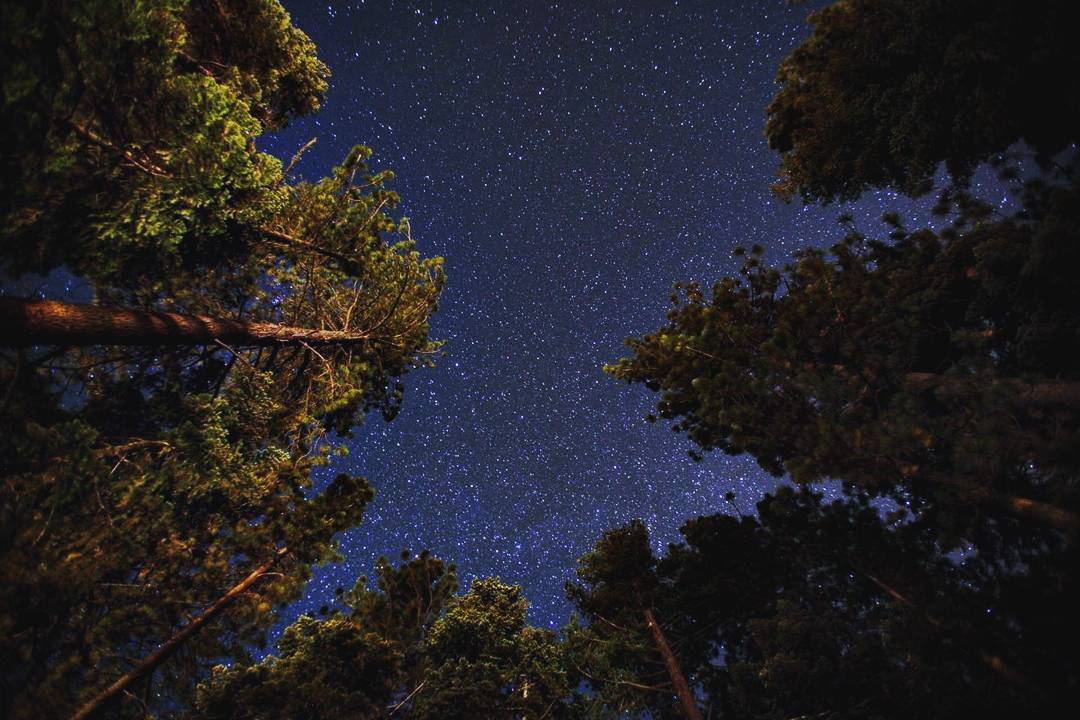
Now that I work with such awesome and creative photographers, on a recent trip to Tahoe, two of them inspired me by so easily taking this shot:
I was like, “wait, it’s that easy?”
So, before a recent trip to Joshua Tree, Carter (your favorite Community Manager!) was kind enough to lend me one of his cameras and share the steps for photographing stars so I could capture the photos I’ve always dreamed of capturing.
While still very amateur and armed with an entry-level DSLR, I was able to capture the below photos while on my trip. I will walk you through what to do so you can capture these ethereal beauties, too. I also made all the mistakes so you don’t have to (particularly a really big and embarrassing one!).
1. Get a camera and a tripod.
A tripod is crucial (a camera is too, but you know what I mean). Your hands aren’t steady enough to get crisp shots with any exposure over half a second (we’ll get to the exposure part next).
2. Adjust your aperture.
Aperture is actually a sort of complex concept. So I’m just going to skip the lecture, and just tell you the practice (but if you want to learn all about it, you can, here). Since you’ll be shooting landscape shots for your stars, you’ll want to keep everything in focus — especially if there are trees or rocks in your foreground. Go with an aperture of about f/5.6 or f/8. If you’re just photographing the stars, you can use a wider aperture like f/2.8 (Also, note that it’s better to not shoot with the moon, but we worked with what we had!).
What I shot with: f/5.6
3. Adjust your shutter speed.
The shutter is the mechanism that makes the camera click. Think of it like a trapdoor that normally opens briefly to let your camera see the world. It’s the doorway between your camera’s sensor (where an image is recorded) and the lens that you see the world through. The longer you leave the shutter open, the more light comes in and the more exposed (or brighter) your image will be. This is why it’s called a long exposure. When you’re trying to capture stars that are inaccessible to the naked eye, a brighter image is exactly what you want. You won’t know which ones work until you shoot and see (You can also purchase a shutter release controller that would allow you to do over 30 seconds for about $25).
What I shot with: I started each shot at 5” and then would go up to 10”, 15”, 20” and 25”.
4. Adjust your ISO.
You’re also going to need a higher light sensitivity. This is called your ISO. A high ISO means that your sensor will expose your image more easily. Sounds like a winner right off the bat, but images with a high ISO will also be noisy. That means they’ll look grainy. You’ll want to find a balance between a long shutter speed and a moderately high ISO. Don’t crank it all the way up. Somewhere in the 4,500 to 6,000 range should be enough.
What I shot with: 3,200
5. Set your lens to manual mode.
This is when things got weird. Carter told me to hang in there, that it may be tough, but I’ll get the shot. So, when I couldn’t focus the camera, and it took forever for me to get the shot, I thought it was normal. My partner and I were running around lighting things like our tent and yucca trees so that the camera could focus on something. Then, once we got it, we’d slowly remove the lighting, up the aperture and cross our fingers. The next day, a fellow camper was like “Oh, you just have to click the lens to manual mode and focus to infinity.” I was like, “Manual-what and infinity-who?” She clicked it, adjusted the tip of the lens, and that night while staying in the village, we finally were able to focus on anything we wanted. We could have clicked all night long! If only we had known! I still used the moon as a starting point to focus to infinity, and after that, shooting stars was a breeze and we even had some fun making light painting photos (that post is coming, soon!). On the bright side, we learned a lot about lighting night photos (any photographers need a new lighting assistant? I’m yours).
Hope these help. Can’t wait to see what you capture and create. Share your star photos to PicsArt photo editor with the hashtag #Stars so we can see how awesome you are!


No comments:
Post a Comment